We had a lot of fun at Stamp Club on Thursday night. We made 1 treat holder with the "Envelope Punch Board" and a second treat holder made with the new and totally awesome (my new favorite) "Curvy Keepsake Box" Framelit. We also made a card with the Starburst (or Sunburst) technique which I've been wanting to try for a long time.
Project 1: Starburst Card
Why re-invent the wheel?! I researched a few video tutorials and found this one to be clear and easy to follow. Please watch:
Easy Starburst
Then I got started and made several samples. It's pretty quick once you get going. This is the card we made at Club:
We used some retired DSP, Cherry Cobbler, Old Olive and Vanilla card stock. Following the same instructions as the tutorial, Begin with 4 strips of DSP that are 1 1/2" x 4". Cut each into triangles using the Stampin' Trimmer. Try out your pattern/placement of how you want the triangles arranged before you begin gluing. Just choose a look that is pleasing to your eye. Then set those aside briefly.
Take a scrap piece of card stock (we used vanilla) that measures 2 3/4" x 5" and completely cover it with glue from the "Stampin' Glue Sticks". Then, beginning at the center point of the scrap cardstock, place your first 2 triangles. Continue to build out your starburst by placing the remaining triangles. If you need to reposition any of these, you will have time before the glue dries. That is hepful in case you need adjust how the wedge fits and in order to make the 8 triangles completely cover the scrap of cardstock. Once complete, press down firmly on all your triangles. Turn this whole thing over and using "Paper Snips", trim off all of the DSP edges that are overhanging the cardstock. (Again - if you view the tutorial you can see all these steps).
Adhere the completed starburst onto your card front and embellish accordingly.
We used the 1 3/4" circle punch to make an Old Olive circle, the "Stars" framelits and "Big Shot" to make a Cherry Cobbler star, and the 1/2" circle punch to make a vanilla circle. The word is stamped in Cherry Cobbler ink and is from the "Good Greetings" stamp set (hostess set). Rhinestones were added for "bling".
Below are the photos of all the other samples that I made on the afternoon that I watched the tutorial.
Project 2: Mini Open Basket
 |
| Retired DSP, Retired ribon, Label Love stamp set, Artisan Label, Mossy Meadow ink, Baker's Twine in Gold. |
Start with a 6" x 6" piece of card stock or DSP. (my examples are with retired Christmas DSP). And pull out your "Envelope Punch Board".
You will line up your left edge of paper at the 1 1/2" mark. Score and Punch. Turn 1/4 turn.
Line it up at 2 1/2" mark this time. Score and Punch. Turn.
Line up at 1 1/2" mark. Score and Punch. Turn.
Line up at 2 1/2" mark. Score and Punch.
This is where it gets tricky, and you should view
the Tutorial I found, if you are having trouble understanding the next step.
Slide the paper back into the Envelope Punch Board on any side, with the "dip" (the part you punched) near the center "pointer". Now slide the paper to the left until the
pointer lines up with the next score line that you already made on the paper. At this point, Punch and Score.
You will now have 2 "dips" on that edge of the paper.
Turn and do this same process on all the sides. Your paper should look like this:
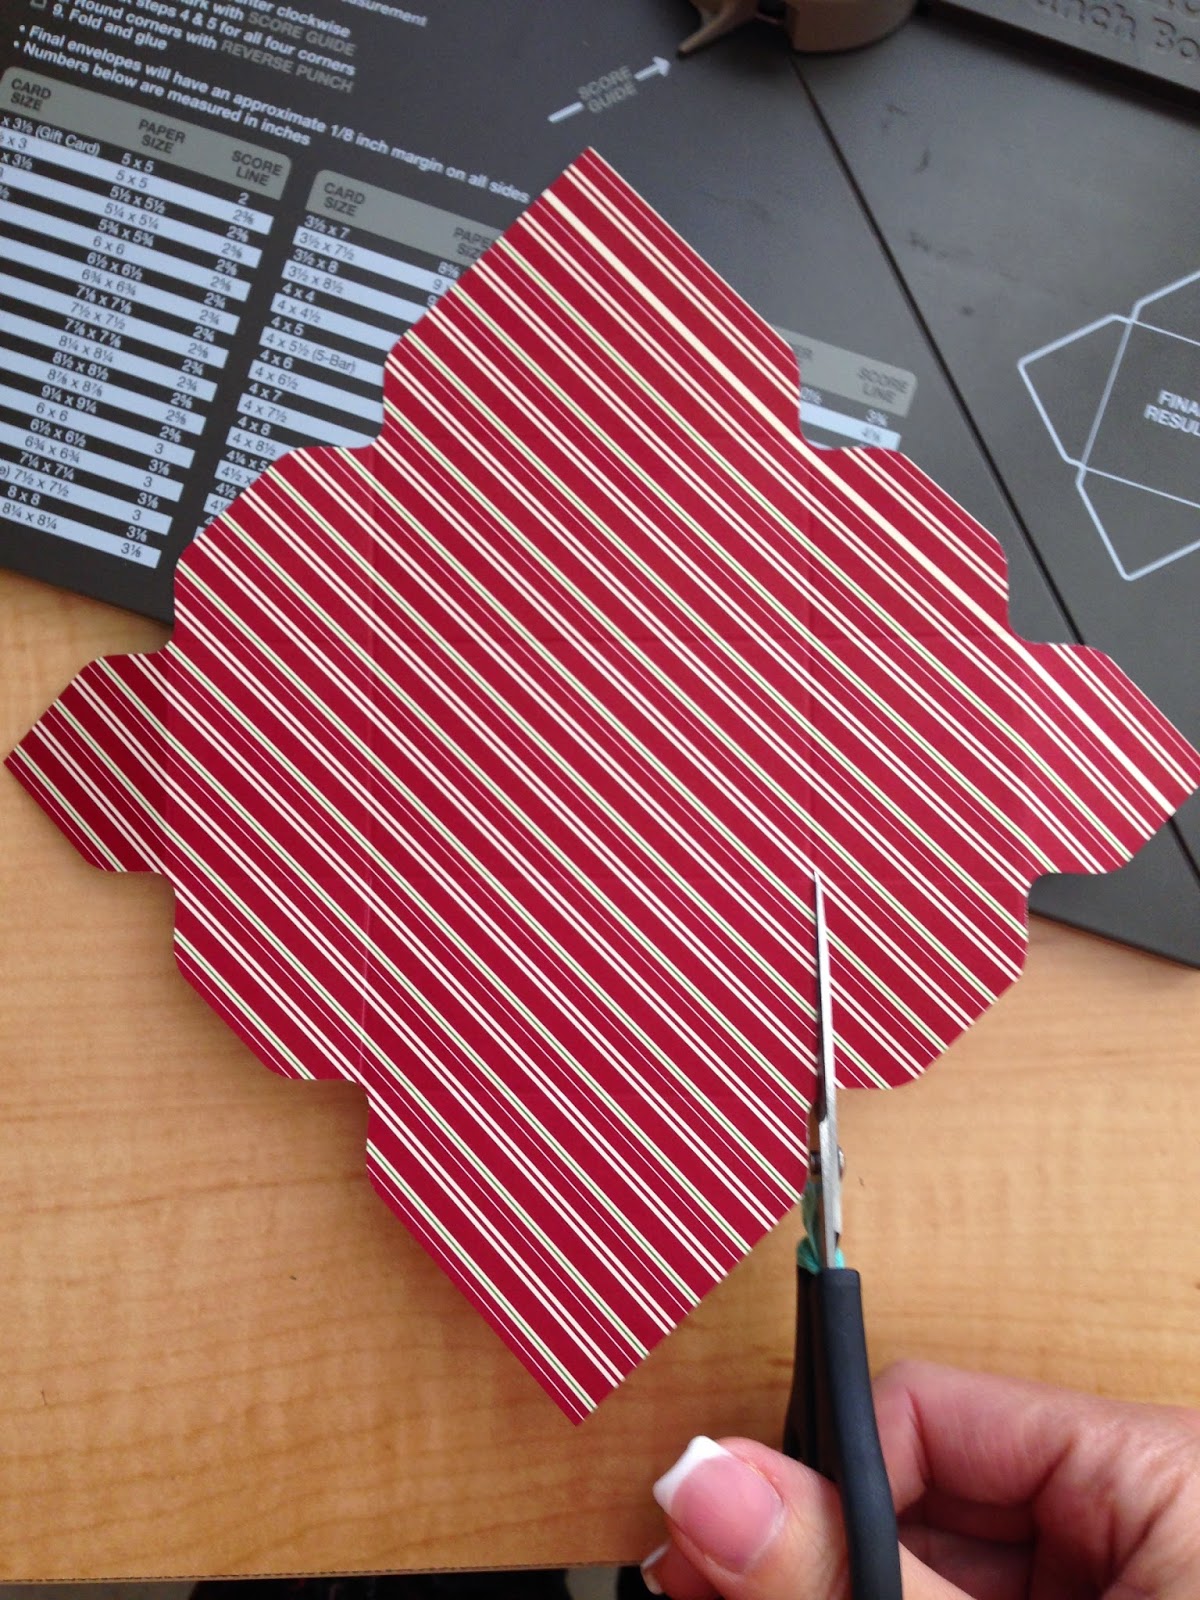
Next you will snip the paper on the score line to the right and to the left of the large triangle ends. Stop when the scissor tips reach the score line it crosses:
You will do this on the 2 sides having the large triangles giving you a total of 4 snips:
The 2 small triangle ends are flaps that will get secured down now. Folded "in" means you will secure the flaps to the opposite side of the paper that you want showing:
And you will end up with box sides that look like this:
If you fold and secure the flaps "out" like this....
Then the sides of your basket will have the opposing paper showing when finished:
Obviously some patterns of paper will lend themselves better to having the opposing paper showing or not. And it's personal preference as well :)
Before securing the whole basket together, take a moment to punch the handles. We used the 3/4" circle punch to do this. Punch the handles out of the large triangle ends, being sure to punch far enough away from the edges so your ribbon won't rip the paper.
I like the trick of using a scrap piece of copy paper as a template. (it is temporarily secured with a tiny dab of SNAIL adhesive):
Then punch right over the template:
Remove template and stick to other large triangle end and punch:
Now add strong adhesive (Tombow liquid glue, Sticky Strip, Fast Fuse or Scor-Tape) to the 4 "corners" as shown:
Carefully line up the first of 4 corners:
All 4 corners in place, press tightly to secure and voila!!:
Add a tag, embellish etc. And fill with goodies.
Here are some others I made as samples:
 |
| Under the Tree DSP, Real Red cotton ribbon, Baker's Twine in Red, tag shape from Curvy Keepsake framelits. | |
|
 |
Retired DSP, Fun Fall Framelits, Pumpkin Pie ink and card stock, Good Greeting stamp set (hostess set), White & Tangerine Tango Two-Tone Trim.
|
Added Hint: You can loop your Baker's Twine over the ribbon bow that you've started which will anchor your tag nicely:
Project 3: Curvy Keepsake Box "Santa"
My friend and fellow-demonstrator, Jean Marie, sent me a photo of the Santa box. I don't know where she got it, but I was quick to copy it!
The basic directions are found in this
Video Tutorial from Stampin' Up. It's worth watching.
My basic directions are below:
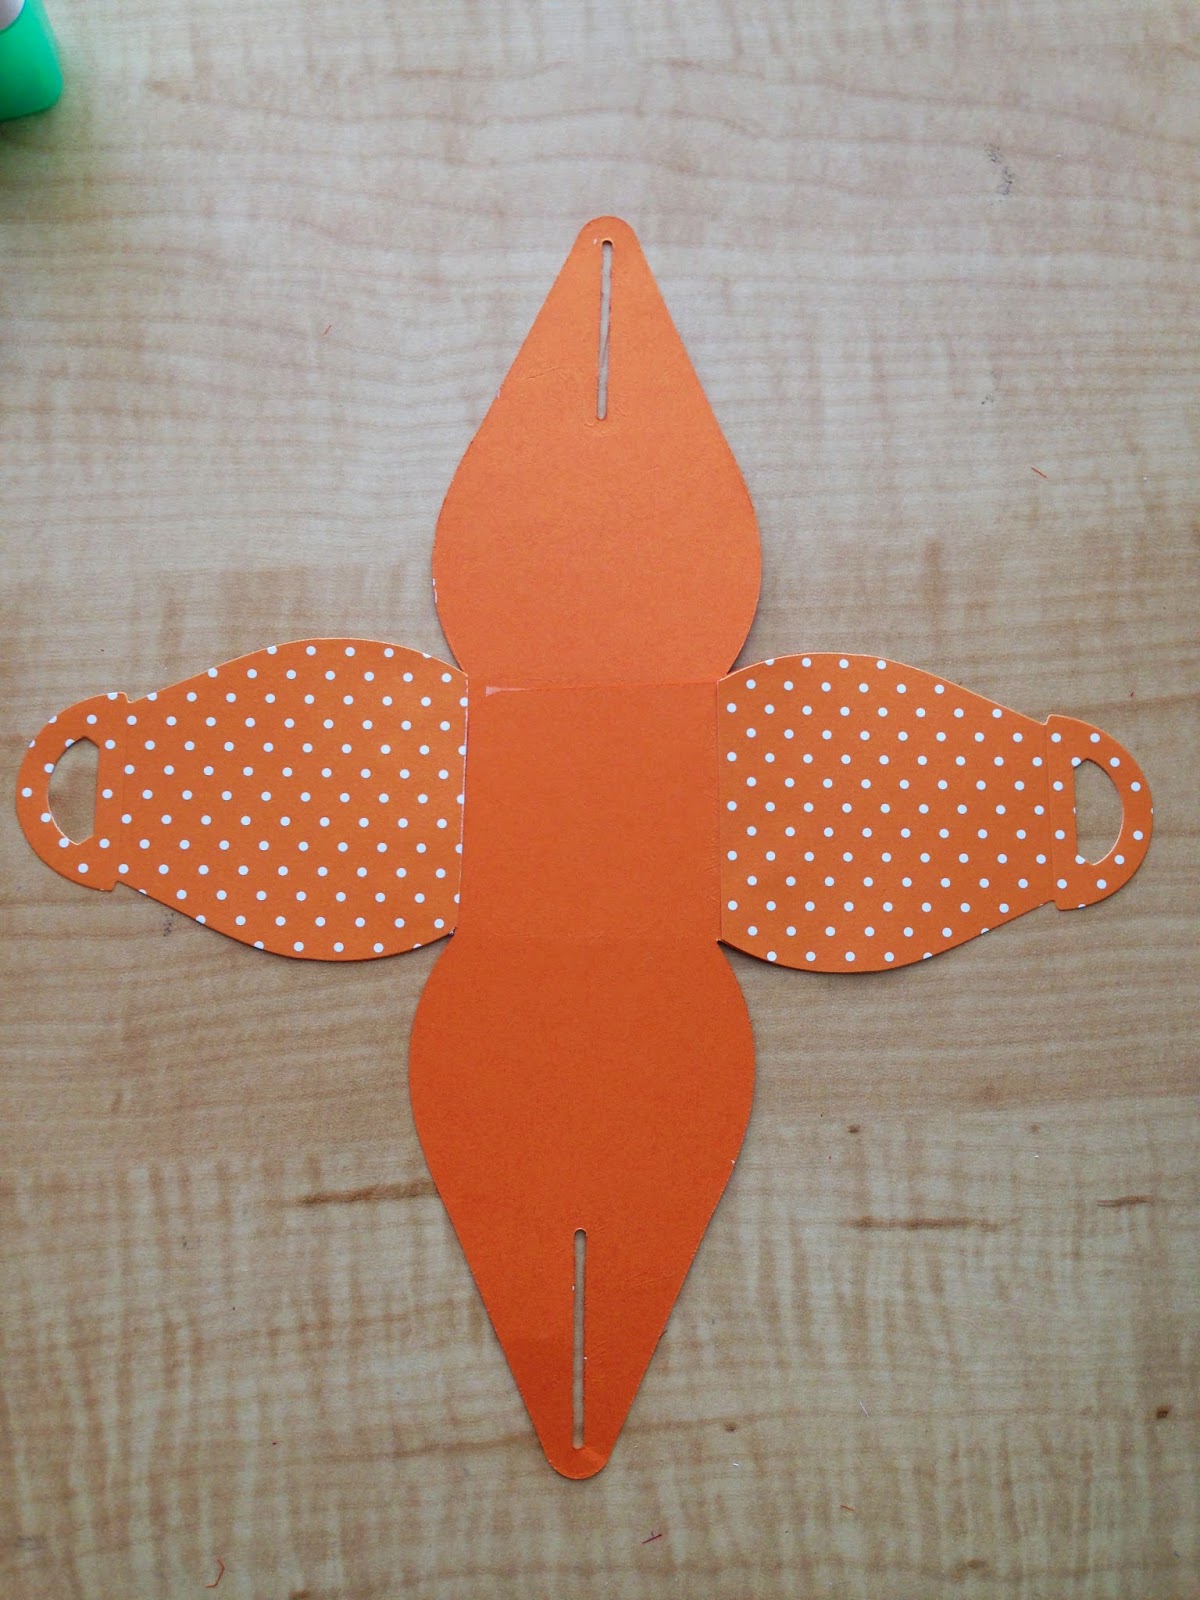
Start with a 6" x 11"piece of Real Red card stock. Use the Big Shot and the Curvy Keepsake Box framelit to cut your first shape out:
Remove that shape, reposition card stock and framelit so you can fit the second one on the same card stock. You will also have room to cut out 1 or more tags at the same time:
Remove pieces, set tag aside. Lay the 2 box pieces so that the "handles"are opposite each other and "slots" opposite each other:
Secure at the center, overlapping area using strong adhesive (Scor-tape, Sticky Strip, Fast Fuse or Tombox liquid glue). I recommend Tombow on this project because it gives you a little "wiggle time" to get the pieces just right before it begins to set up. Here are my pieces with the Tombow in place and getting ready to attach the second piece:
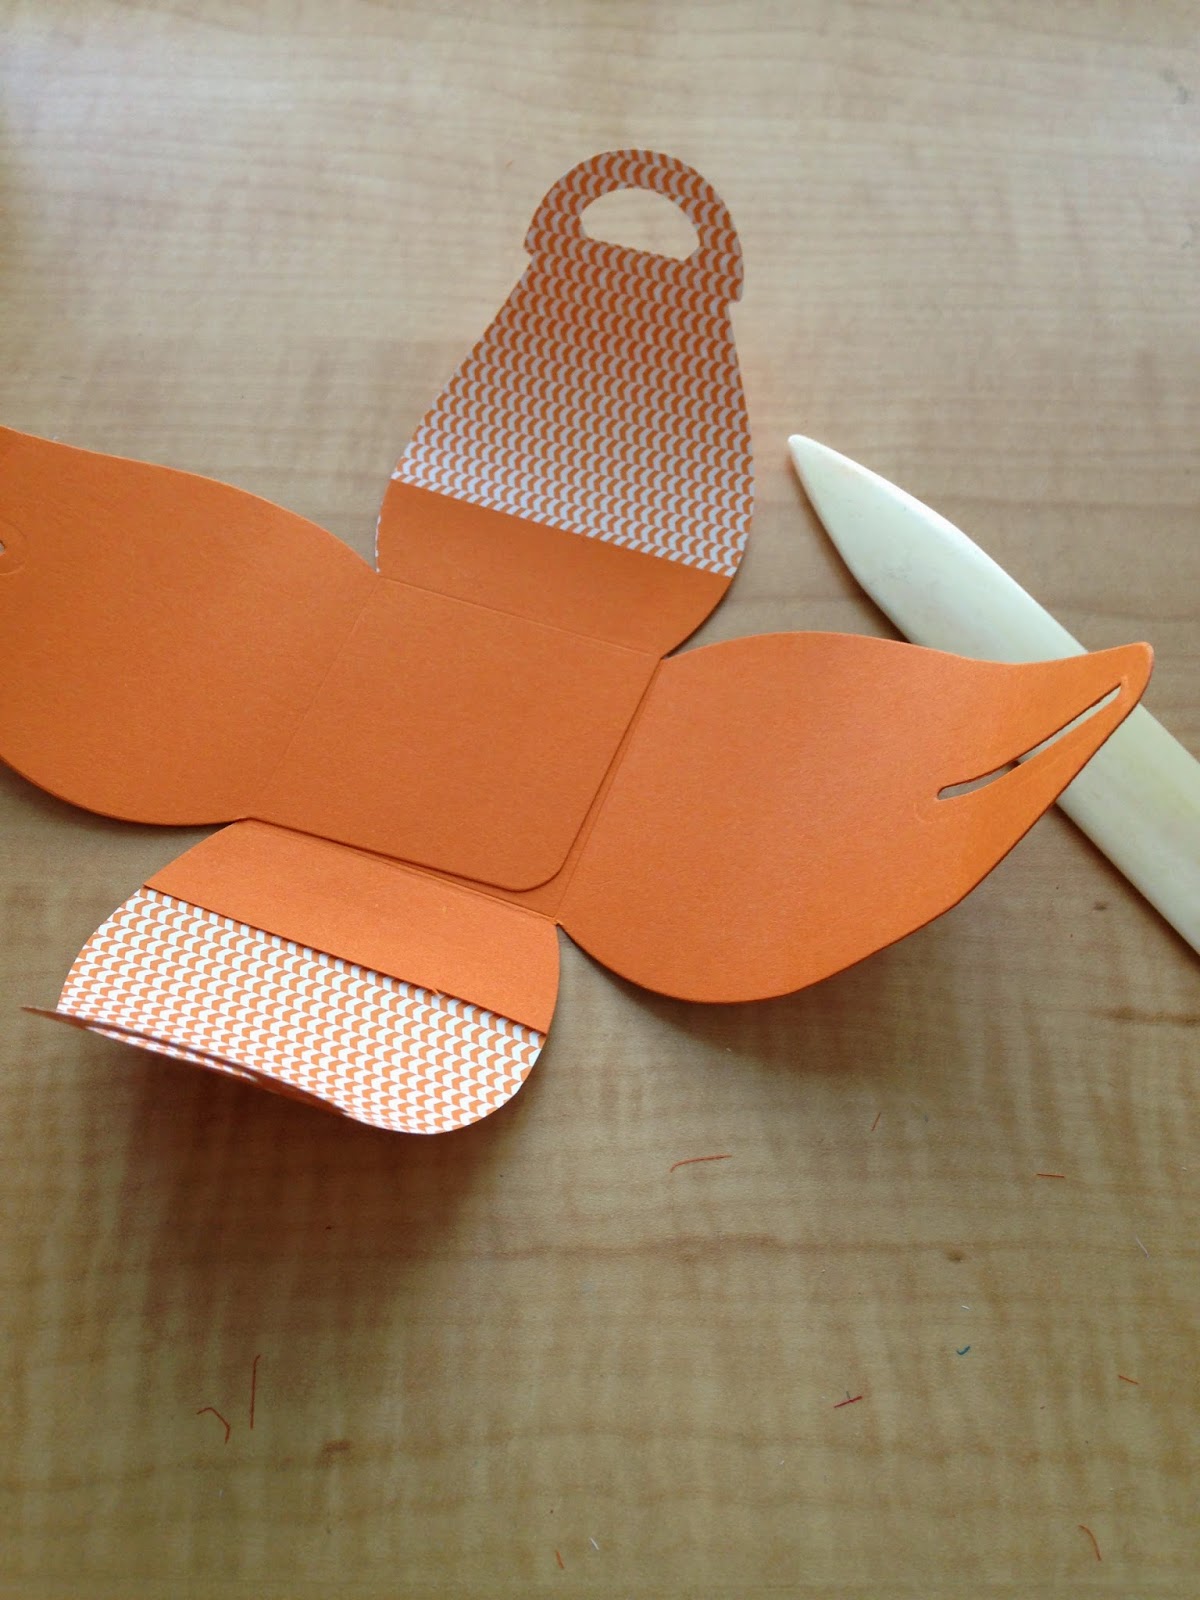
This step is
critical to get a nicely shaped finished product: Use a Bone Folder to gently give each side a curve. This breaks down the fibers of the card stock a bit, and causes it to curve. This is exactly what you want and it will keep your box from fighting with you when you try to close it.
Here is what is looks like after you've used the Bone Folder on all 4 sides:
Bring the handles together and slide the slotted pieces over the handles, one at a time to complete your box. To create the "Santa" we used a strip of Basic Black cardstock for the belt and also made black buttons using a 3/8" circle punch (retired). The belt buckle is a scrap of Whisper White card stock punched with the Petite Curly Label Punch and a tiny scrap of black card stock added to the center of it.
We added a Tag (cut from the Curvy Keepsake Box framelits) attached with white Baker's Twine. For the greeting, we used "A Round Array" stamp set, Memento black ink, and the 7/8" scallop circle punch. here is a close up:
Below are other Curvy Keepsake boxes that I made because I couldn't help myself!! (Note: I found video tutorials on Youtube for making the Penguin and also how to do a box with a window in it). If you have specific questions or can't find the videos, just email me and I'll help you.
Thanks for visiting Paper Desserts!
Julie