Follow me on Pinterest

Saturday, December 28, 2013

Curly Paper Christmas Trees


This year, the Stamp club term ended in November.  Instead of starting a new term in December, I decided to wait until January.  But knowing that most of the gals (and I) would still want to get together and stamp if possible - we kept our usual "2nd Thursday" date and had a Christmas Party instead (with stamping, of course).
We made a snowflake tag/tie-on for hanging on a package that was so stinkin' cute, mine got used on an actual package (correction - all 3 of mine got used).  So no photo here - sorry.

The second project was a Curly Paper Christmas Tree.

I completely copied the idea - you can see the post from  Patty Bennett including directions and all the details.

My trio of trees here:


I bought the green styrofoam trees at Hobby Lobby (in floral section) as they were cheaper than JoAnn's. (didn't try Michaels).  I found that the largest tree (nearly 18" tall) would have been TOO tall and taken a TON of paper.  So in my trio of trees, the tallest one is the 8" size and then they go down from there.
I used store-bought ornaments for the topper, which just got shoved into the styrofoam after a little well was made and some hot glue dribbled down into it.  These were SUPER fun to make and took nearly NO brain-power.  (It was nice to sit in front of Christmas movies on LMN and work on my trees!!)

The gals at Stamp Club were thinking these curly paper trees are not just for Christmas, and could be made with any desired DSP for other occasions!  I've also seen posts of Curly Paper Wreaths, and Curly Paper Topiary.  Lots of fun ideas with just paper, foam and pins!!


Tuesday, October 22, 2013

Spooky Banner

Well, I got it done!  My first attempt at the Banner Simply Created Kit and it came out great!
I used the Kit and the Accessory Kit (see holiday catalog pages 30-31).
Here is is, hanging above my fireplace...

Colors: Basic Black, Summer Starfruit, Pumpkin Pie.
Helpful hints:  Don't use the spritzers that come with kit.  Save those for another day. They are very messy and not very accurate. I learned to use sponge daubers with all the stenciling steps, and it worked great!  And easy too!
I used my StazOn black ink pad for the letters as my Basic Black ink pad just didn't look dark enough (maybe it just needed re-inking).
When done using a stencil, I suggest cleaning it with a damp paper towel.  This prevents you from accidentally transferring wet ink from stencil onto your fingers or banner pieces.  To clean StazOn from the stencils, just use your StazOn cleaner and a paper towel.
I used the pieces from the accessory kit for embellishments and didn't need anything additional.  Of course you COULD do the embellishing on your own, but boy was the accessory kit quick and easy.

Banners are so popular right now - for any occasion!  Be sure to buy 1 (or more) while the Holiday Catalog is still in effect). Order online at juliebaum.stampinup.net

Thanks for stopping by!


Tuesday, October 15, 2013

Pop & Place

Stamp Club October 2013

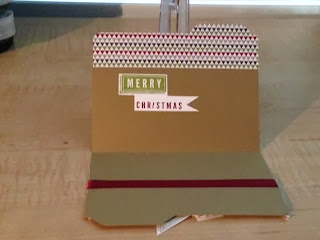
These are the 3 projects we made at Club last week:

Thinlets Circle Card "Have yourself a Merry Little Christmas"


Thinlits Circle card Die, Bermuda Bay cardstock, Winter Frost DSP, Coastal Cabana cardstock,       
Brushed Silver cardstock, Festive Flurry (Bundle – stamp set & Framelits), Coastal Cabana ink pad   
Encore Ink Pad – Silver, Merry Little Christmas stamp set, Artisan Label Punch, 
Decorative label punch, Rhinestone Basic jewels, Dimensionals.

File Folder Card with "Banner Christmas"

Baked Brown Sugar cardstock, Cherry Cobbler cardstock, Season of Style DSP, A Banner Christmas,
Baked Brown Sugar ink pad, 1 ¼” Circle punch, 1 3/8” Circle punch, Envelope Punch Board, Baker’s Twine in Cherry Cobbler, Cherry Cobbler Marker, Crumb Cake Marker, Old Olive Marker, Ribbon in Cherry Cobbler (retired), Dimensionals.

Muslin bag for Fall
Really fun and easy!  Insert a stiff piece of cardboard into bag before stamping - it helps a lot. Stamp muslin bags with regular ink pads, Encore ink pads or Staz On.


, , Mini Muslin Bag, Gently Falling stamp set, Magnificent Maple, Tags 4 You (Bundle – stamp set & Punch)Old Olive ink pad, Crushed Curry ink pad, Pumpkin Pie ink pad, Chocolate Chip cardstock 
Baker’s Twine in Early Espresso.
                                             

Saturday, October 5, 2013

Accordion-folded "Grateful" sign


Many of you have asked for directions on making the "Grateful" sign that can sit on a shelf, mantle or table as a Fall decoration.  So here it is!! Below you'll find the step by step directions as well as photos to help.

My example below is made with: Chocolate Chip card stock for the base, “Sweater Weather” DSP, card stock pieces in Soft Sky, Tangerine Tango, Sahara Sand, Chocolate Chip, and Crushed Curry.  My letters are from very vanilla cardstock. Punches used: 1 ¼’ circle, 1 3/8” circle, Tab punch (retired), Boho Blossoms,  Itty Bitty Shapes Punch pack. Other embellishments: ribbon scraps in coordinating colors, rhinestone jewels, Candy Dots. 


You will need:
Colored Cardstock for Base (2 pieces measuring 4 ¼” x 11” and 1 piece measuring 4 ¼” x 6 ½”.)
Designer Series Paper, variety of prints (8 pieces total; each measuring 3”x4”)
Colored card stock  (8 pieces total; each measuring 2” x 2 ½” that coordinate with your DSP) plus scraps.
 White or Vanilla Cardstock (depending on what coordinates best with your DSP.)
*Letters spelling GRATEFUL – each should  measure between 1 ¾” tall and 2 ½” max.
Stamps, ink, punches, ribbon etc. for embellishments.

(My letters were made with a Big Shot alphabet die that is no longer available through Stampin’ Up. The current one offered on page 192 makes smaller letters, only 1 ¼” high. So I recommend that you find letters that are the right size whether those are stickers, or die cuts from another source.)

Supplies:

1. Score both of the long card stock pieces at 3 ¼”, 6 ½” and 9 ¾”:


2. Score the short piece at 3 ¼”:
1   3.  Fold accordion style along score lines that you made:


4. Place a generous amount of strong adhesive on the smallest section of your long card stock pieces:


5. Attach the first 2 pieces (long ones) to each other. Then attach the short piece to it to make one long accordion-folded strip:
The seams will be on the back of your project

1  6. Attach colored card stock pieces to coordinating DSP pieces:


1  7. Attach these to the base:
8. Attach letters:
*

1 9. Decorate using punches, stamps, ink, ribbon & embellishments.