Thursday, April 18, 2013
Stamp Club Review
A new term of Stamp Club has just begun! I will miss those of you who are taking a time-out. And a big Welcome Back to those returning!
Our first project was this darling "bag" style container. With just a few minor changes you can also create a box. I learned this project from a tutorial by Kelly Gettelfinger. The Simply Scored tool makes this project a breeze!! Here is a link to her Tutorial. We used a 12x12 sheet of DSP from the recent Sale A Bration promotion. We used the Labels Collection framelits (largest one) to make the top flap. Embellishments include: 1 3/4" scallop circle punch, 3/4'" circle punch, large pearl, soda top pop (the small size, flattened through Big Shot) and a white gel pen.
The second project was made with one of my new favorite stamp sets: Secret Garden (Spring 2013 catalog). I'm quite sure that I CASEd this card from another site with minor changes.
We used DSP from Sunshine & Sprinkles (Spring catalog). The flowers AND leaves (leaves are just petals cut from a flower) are from Secret Garden stamp set. The sentiment is from Friendly Phrases stamp set. Color scheme is Pacific Point, Pretty in Pink, Melon Mambo, Daffodil Delight and Lucky Limeade (detail on leaves is Old Olive).
The final project was another card that I CASE'd. I love the simplicity of this card! For the background texture, the Chevron TIEF was used on this example, but some chose to use the Honeycomb TIEF. Sorry not to show it, but my sample of that one got lost in the shuffle. The Going Gray card stock is the base. Flowers were cut using the Big Shot and the Floral Fusion sizzlit. Matching brads created the center of each flower. Lastly, some Lucky Limeade Baker's Twine was wrapped around card 3 times and tied in a knot. No sentiment was added, so this could be used as an any-occasion card. Color scheme for flowers/brads: In Color 2011-2013 (Island Indigo, Calypso Coral, Lucky Limeade, Pool Party and Wisteria Wonder).
Thanks for stopping by!
Julie
Thursday, March 28, 2013
Friday, March 15, 2013
March 2013 Stamp Club
Yesterday was Stamp Club for March and it was a beautiful day, nearly summer-like here in southern California. The projects I had prepared are all Spring-inspired from pretty florals to the bunny treat holder for Easter. The projects this month were either CASED from other demonstrators or inspired by others. Here is the first project using a single stamp called "Ears to You"
(This project was CASED from my upline Sandy Hancock. You can view her blog here: sandystamper.com). You might notice that my project does not include the greeting "Ears for You". When the stamp arrived, I cut the greeting off of the bottom, basically creating 2 separate stamps: the bunnies, and the words. This way I could easily ink the bunnies and trade the greeting out if I wanted to. In place of "ears to you" I chose the "happy easter" greeting from the Delightful Dozen stamp set. The tube is actually triangle-shaped, super cool! It is a piece of card stock 8" x 4 1/4" and then scored at 2", 4", 6" . After scoring, we ran it through the Big Shot with the Perfect Polka dots embossing folder. We then assembled it (so the plain un-polka dotted portion does not show) and assembled with Scor-Tape. The elegant eggplant and the white shape on the the front are cut with the Big Shot using the Labels Collection framelits. The bunnies are masked so we could easily add the sky with clouds and the grass. A 5" piece of Scallop Dots ribbon (elegant eggplant) was threaded through a punched hole and tied in a knot to finish. A full-size candy bar will fit perfectly in the tube or 2 fun-size packs of M&Ms fits well too (pictured).
The next project was completely CASED from Pam at www.stampandstretch.com The beautiful combination of blues and yellow was enticing and I love, love, love the new Designer Builder Brads.
We used Not Quite Navy, Marina Mist and Daffodil Delight card stock and inks. The sentiment is from the set called Friendly Phrases.
The third project was created using a technique that is called Triple-time Stamping. My good friend and fellow demonstrator Dee Hunt passed this technique along to me. It appears to have originated by Dawn Olchefske at DO Stamping. I chose images from the Everything Eleanor stamp set. the sentiment is from Create a Cupcake stamp set.
The gals in the AM club made the card using Calypso Coral and Lucky Limeade ink, Calypso Coral and Very Vanilla card stock. The gals in the PM club made the card with Pool Party and Lucky Limeade ink and Whisper white and Pool Party card stock. Bakers twine in matching colors is the perfect embellishment, finished with a button (from the current SAB brochure).
I hope you will have lots of fun copying these projects or using them as inspiration for your own amazing projects!
Thursday, December 13, 2012
Friday, October 26, 2012
Stamp Club October 11, 2012
We had lots of fun with texture on this cute Christmas card (sent to me by Dee Hunt):
(sorry - my sample fell on a red ink pad during Club, so it has a smudge on it).
Early Espresso card stock base. Real Red card stock (Scallop Square Bigz die). Old Olive card stock (Vintage Wallpaper textured impressions folder). Tree made from Pennant Punch (old olive card stock and old olive DSP). Small scrap of DSP in Real Red. Small piece of Scallop Dots Ribbon in Chocolate Chip but coordinates just fine with Early Espresso card stock). The Pennant Parade stamp set was used for the tree topper and the tree base.
This is a super easy-to-duplicate project (you could really make these for your Thanksgiving table!!)
Napkin Rings:
Day of Gratitude stamp set. Early Espresso ink pad. Cajun Craze, Wild Wasabi, More Mustard and Very Vanilla card stock. The sentiment is punched with the Decorative Label punch. Note on one of the rings, there is an additional layer punched with a retired punch. (So sad). But it actually is fine without it.
We made the Cupcake pick (with Gingerbread man) at Club, but I wanted to show you the Candy Corn cupcake picks I made for my own use. That one was another cute idea from Dee Hunt - thanks Dee!
Gingerbread Man cupcake pick: Chocolate Chip ink pad. Whisper White, Gumball Green and Real Red card stock. 1" circle punch, 1 1/4" circle punch, Scallop Circle Punch. Heavy duty, "elegant" toothpicks found at Target.
Candy Corn cupcake pick: Pennant Punch, 2 3/8" Scallop Circle, 1 3/4" circle punch. Basic Black, Whisper White, Garden Green card stock. The candy corn is made from Polka dot Parade DSP. The small "boo" tag is from Tiny Tags stamp set and Little Labels Punch Pack.
Now I guess I should go make my Halloween cupcakes!
We also made the Pumpkin treat holder (holds 1 Hershey's Nugget) pictured here on the right:
The ghost and bat are mine from a previous Halloween - maybe 2 years ago? Here are photos of those little cuties!!
The mummy, ghost and pumpkin are the easiest ones to make. The base of the treat holder is made with 2 pieces punched from Petal Card Double punch. Have fun!!
Saturday, September 29, 2012
Jumbo Sticky Rounds
As you saw in my last post, we created a beautiful embellishment for the front of our little Christmas treat box. The base of the embellishment (under the paper rosette) was created using the new Scalloped Tulle found in the Holiday catalog. To make it super easy, we used Jumbo Sticky Rounds to create this. See below for 1 option of how to build your embellishment:
1. Separate 1 Sticky Round from the sheet (of 6).
2. Peel apart the layers. Lay sticky-side up on your work surface. (Sticky part may stay attached to the pink part OR the clear part. It doesn't matter. In this photo, mine stayed attached to the pink part.)
3. Using 12" of Scalloped Tulle, begin to gather the tulle and press down onto the Sticky Round as shown:
4. Continue working around the Sticky Circle, using all of your length of tulle.
Tuesday, September 25, 2012
Stamp Club projects from September 13
At Stamp Club we began projects for the holidays. First project is this super simple halloween card:
The stamp set featured is found in the Holiday Catalog. It's called Toxic Treats. We stamped the witch image, using Basic Black ink, onto Very Vanilla card stock and cut the shape with Framelits: Labels Collection. The Basic Gray piece is also cut with the same, but one size larger. The paper is Howlstooth & Scaringbone DSP (Holiday catalog). The card base is Basic Black card stock that has been run through the Big Shot, using the Fancy Fan Folder. Great texture!! My sample is finished with some retired black lace ribbon, but the 1/2" Striped Satin Ribbon (black or gray) in the Holiday catalog would make a perfect choice! This card was super fast and easy. It's a great template to use for other cards too.
The next project is this charming card featuring the new Perfectly Preserved stamp set and Framelits: Cannery Set.
This card was CASED from another stamper while I was web-surfing. Note how cute the lid is! We cut the lid using the Framelits and tied Bakers Twine (Cherry Cobbler) around it. So cute! Other elements are the Crumb Cake card stock layer that was run through the Big Shot with the Square Lattice Folder (a favorite of mine), The Cherry Cobbler card stock layer that was punched with the Scallop Trim Border punch, the Orchard Harvest DSP, Framelits: Bitty Banners, and a button accent to finish it all. Base of card is Early Espresso card stock.
And finally we forced ourselves to start thinking about Christmas. The treat-box we made was CASED from Patty Bennett with small adjustments made for the materials I had on hand.
My box started as a piece of Gumball Green card stock, measuring 4 1/4" x 10 1/2". Be of Good Cheer DSP pieces measure 2 3/4" x 3" (2) and 1 3/4" x 3" (2). There is a strip for the rosette measuring 1"x 12".
All pieces are pictured here:
The box is made by scoring the card stock at 3", 5", 8" and 10" as shown:
Then turn the card stock and score at 1" as shown:
Snip the bottom edge up to where the score lines intersect, and you can completely remove the small rectangle at the corner:
Assemble box using Sticky Strip.
The rest is easy to copy from the photos, with exception to the Rosette. I will post the directions for the Rosette. soon.
Happy Stamping!
The stamp set featured is found in the Holiday Catalog. It's called Toxic Treats. We stamped the witch image, using Basic Black ink, onto Very Vanilla card stock and cut the shape with Framelits: Labels Collection. The Basic Gray piece is also cut with the same, but one size larger. The paper is Howlstooth & Scaringbone DSP (Holiday catalog). The card base is Basic Black card stock that has been run through the Big Shot, using the Fancy Fan Folder. Great texture!! My sample is finished with some retired black lace ribbon, but the 1/2" Striped Satin Ribbon (black or gray) in the Holiday catalog would make a perfect choice! This card was super fast and easy. It's a great template to use for other cards too.
The next project is this charming card featuring the new Perfectly Preserved stamp set and Framelits: Cannery Set.
This card was CASED from another stamper while I was web-surfing. Note how cute the lid is! We cut the lid using the Framelits and tied Bakers Twine (Cherry Cobbler) around it. So cute! Other elements are the Crumb Cake card stock layer that was run through the Big Shot with the Square Lattice Folder (a favorite of mine), The Cherry Cobbler card stock layer that was punched with the Scallop Trim Border punch, the Orchard Harvest DSP, Framelits: Bitty Banners, and a button accent to finish it all. Base of card is Early Espresso card stock.
And finally we forced ourselves to start thinking about Christmas. The treat-box we made was CASED from Patty Bennett with small adjustments made for the materials I had on hand.
My box started as a piece of Gumball Green card stock, measuring 4 1/4" x 10 1/2". Be of Good Cheer DSP pieces measure 2 3/4" x 3" (2) and 1 3/4" x 3" (2). There is a strip for the rosette measuring 1"x 12".
All pieces are pictured here:
The box is made by scoring the card stock at 3", 5", 8" and 10" as shown:
Then turn the card stock and score at 1" as shown:
Snip the bottom edge up to where the score lines intersect, and you can completely remove the small rectangle at the corner:
Assemble box using Sticky Strip.
The rest is easy to copy from the photos, with exception to the Rosette. I will post the directions for the Rosette. soon.
Happy Stamping!
Monday, August 13, 2012
Stamp Club August 2012
Here are 3 projects that we made last week at Stamp Club!
This cute card* is made with the Summer Silhouettes stamp set which is becoming a huge favorite! The border on the Calypso Coral cardstock is made using the Framed Tulips Folder (for Big Shot).
DSP (retired) in a Wisteria Wonder pattern, and the Wisteria Wonder Ruffled Ribbon make it pop!
Colors: Calypso Coral, Wisteria Wonder, Lucky Limeade.
*summer silhouettes card layout was CASED from another site and then altered to suit.
It's not too early for Halloween projects! It will be here before you know it.
This card features the Bootiful Occasions stamp set. Note the little piece of patterned paper from Howlstooth & Herringbone DSP! The Basic Gray card stock base has vertical stripes for texture (Stripes Folder for Big Shot) and the black cut out behind the boot is made with Labels Collection Framelits (for Big Shot) and added texture from Vintage Wallpaper Folder (Big Shot). A knotted piece of 1/4" Stitched grosgrain ribbon in Basic Gray is attached with some Sticky Strip. Finally the boot is embellished with Rhinestone Basic Jewels for a little *Bling*.
Colors: Basic Black, Pumpkin Pie, Basic Gray, Whisper White card stock
A Halloween basket is simple using the Simply Scored tool. My basket is made with Eggplant Envy card stock, Eggplant Envy DSP and features the new Googly Ghouls stamp set. Of course the goolie eyes are a must! Instructions for Basket are below, shown on a piece of Basic Black card stock.
Card stock measures 8 1/2" x 7 1/2". Lay cardstock lengthwise on Simply Scored and score at 1", 2", 3" 5 1/2", 6 1/2" and 7 1/2" as shown:
Then turn 1/4 turn and score at 2 1/2" and 5" as shown:
With scissors -Snip all the little strips up to the score line that they intersect as shown:
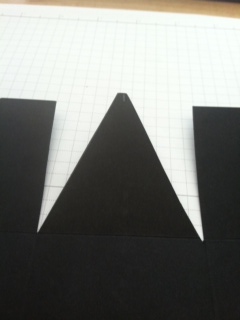
Find the center of the larger section and mark with pencil. Next draw lines from the top corner of that section, down to your center mark (just outside of mark is better):
You will do that same step on the opposite side as well. And then remove the triangle portions that you've marked (4 in all):
Now assemble the sides: keep the triangle portion on the outside of the basket and gather up the sides alternating right/left/right/left until they are all gathered behind the triangle as shown:
At this point you can use staples to secure it. Or if you prefer you can punch holes and run a brad through it. We added a handle (1" wide card stock plus a 3/4" strip of DSP for decoration). Assembly was completely done with staples because the little witch covers staples on one side, and strategic placement of handle and staples finishes the other side.
Thanks for stopping by. Happy Stamping!
Subscribe to:
Posts (Atom)