The third, out of three Stamp Club projects this month is this card made using a "split card" technique. I am very new to this idea and am having fun playing with it. It can be a bit challenging because the stamping is done rather "freestyle" rather than having an exact model to follow. The card we made in Club was done by stamping the design, but look below for other split-cards that were done by using Die Cuts.
The basic idea of a split card is to stamp (or lay down die cuts) one large panel in the center of a piece of cardstock that ultimately will get cut in 1/2 creating 2 card fronts. Stamp once but the result is 2 card fronts.

8 1/2" x 5 1/2" Blackberry Bliss, folded in half to create card base.
Whisper White cardstock began as 88 1/2" x 5 1/2" for all stamping, then was cut down center at 4 1/4". Edges were trimmed to allow card base to show around all edges.
Forever Fern stamp set.
Blackberry Bliss, Shaded Spruce, Old Olive and Pear Pizzazz inks.
Whisper White crinkled seam binding ribbon was used - We dyed the ink with a Blackberry Bliss Stampin' Blend.
Here is a similar look, and you can see how the one Whisper White piece was stamped then cut into 2 card fronts....

This card was created by stamping flowers and leaves from To a Wild Rose stamp set, and cutting them out with dies. Images were then laid in a design and glued down securely onto Whisper White cardstock before cutting the cardstock into 2 card fronts.

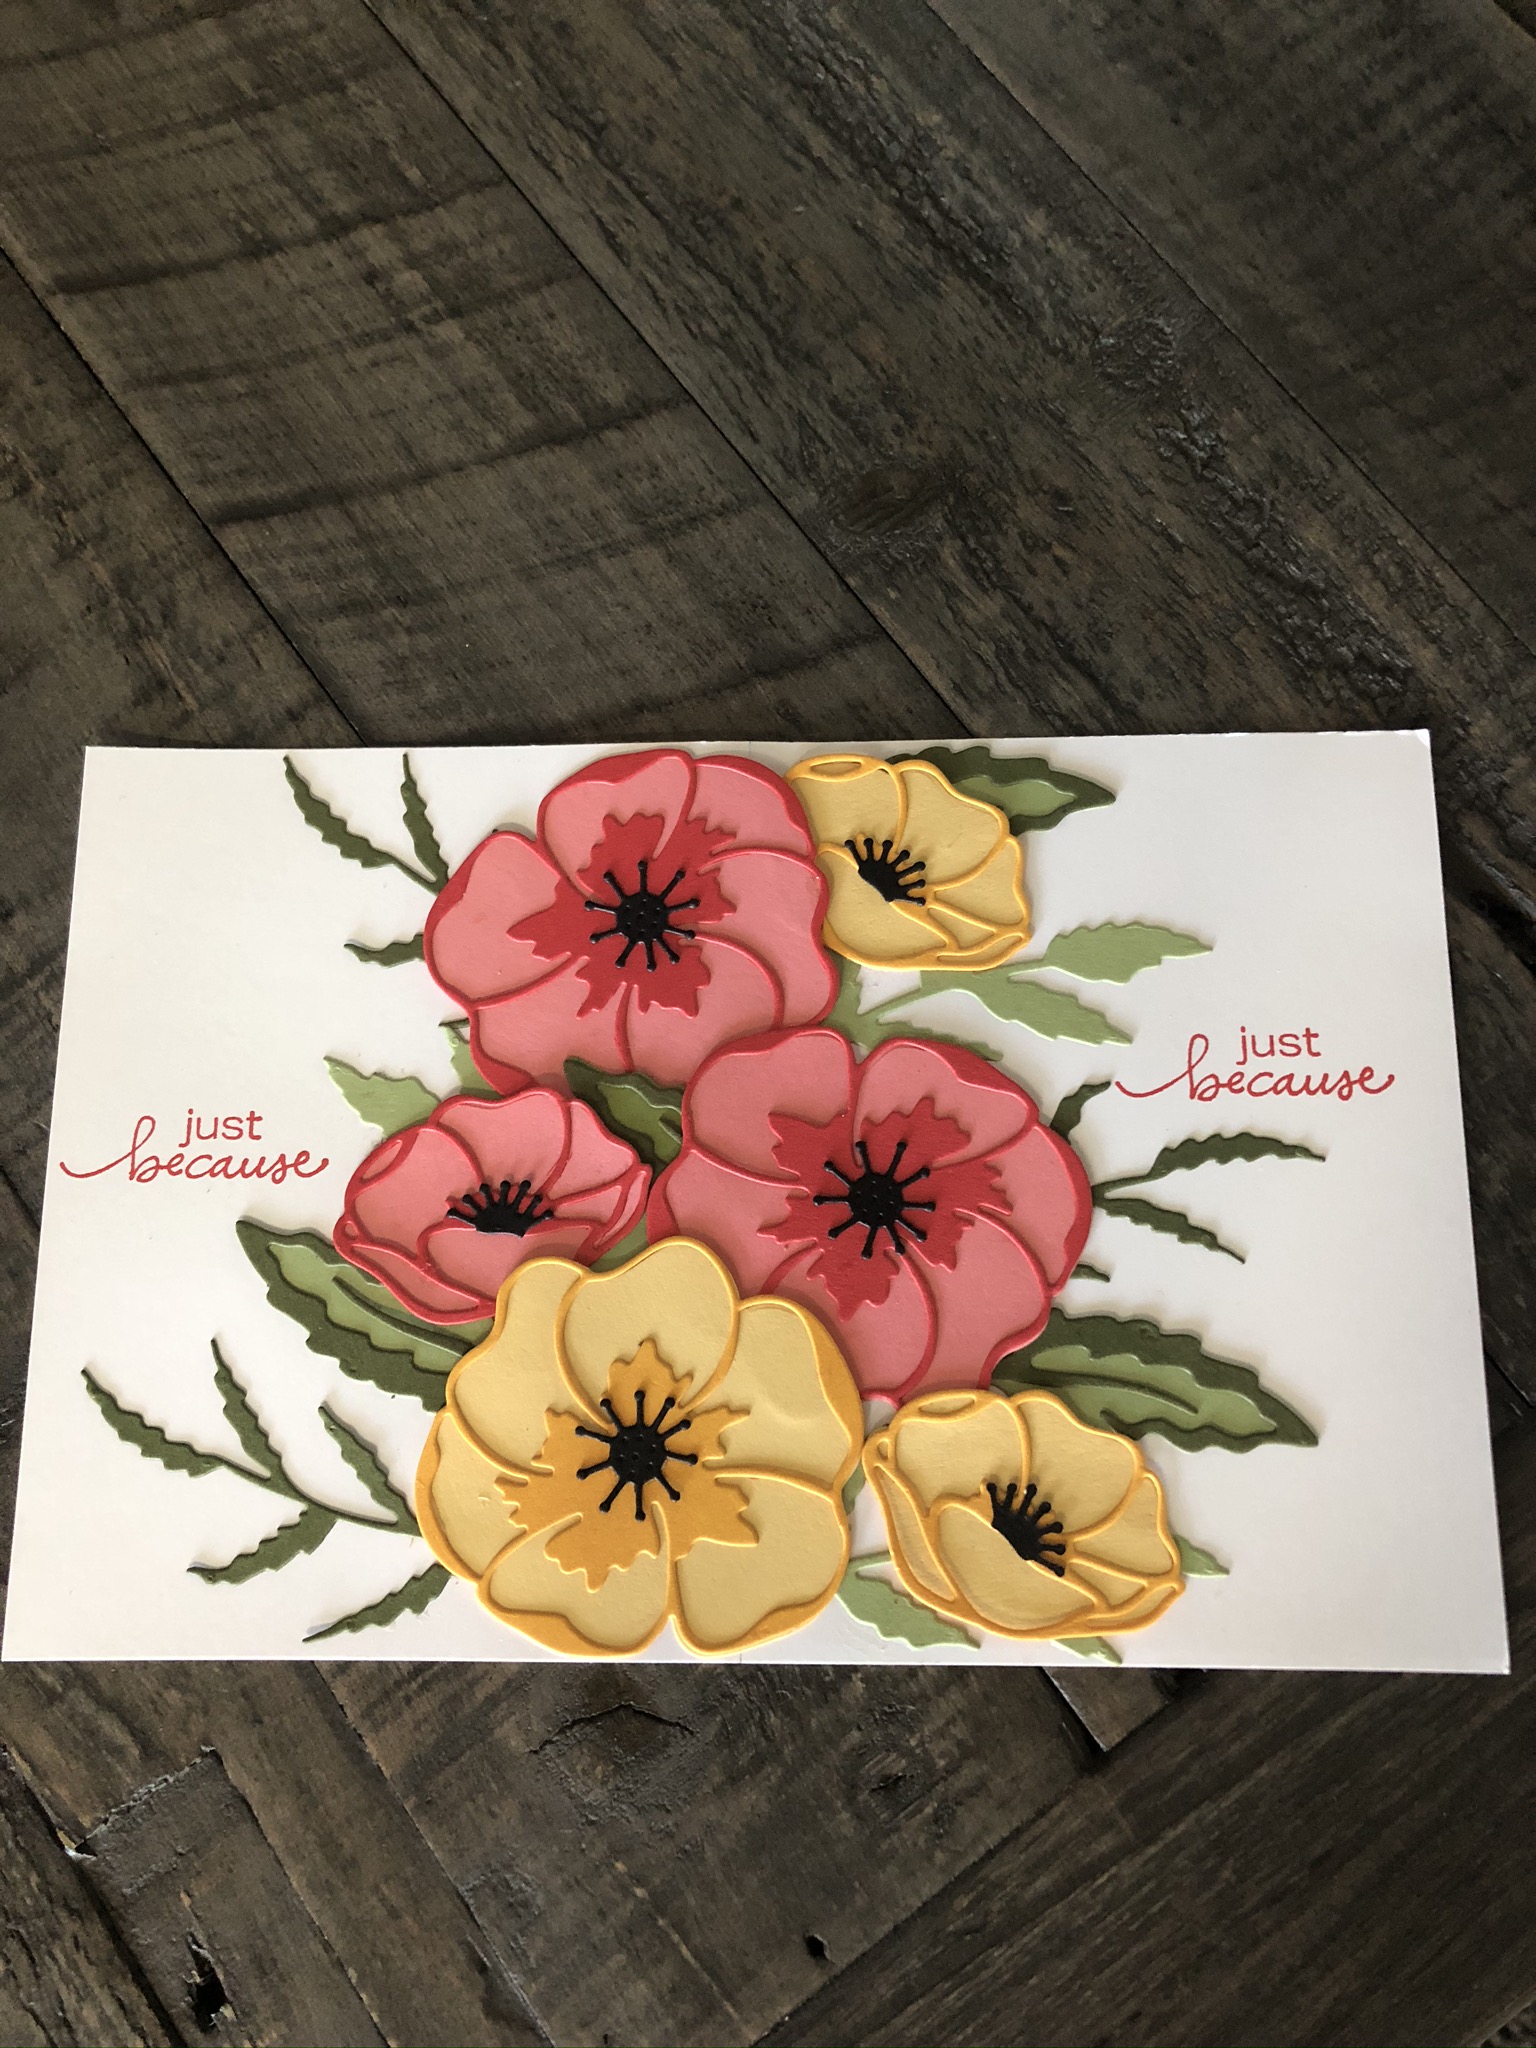
In similar process, these die cuts, from Poppy Moments, have been laid down in a design and glued securely prior to the Whisper White cardstock.
It has not been, but is ready to be cut into 2 card fronts:
Look on Facebook and Youtube for my Split Card tutorial.
No comments:
Post a Comment