I originally saw the Tea light Holder at the Pink Buckaroo blog where Erica gave credit to Tanya Boser of Tinkerin-in-Ink and her instructions. So thanks to the inspiration, I gave it a whirl and have done a Fall tealight holder...
And some Christmasy ones in Old Olive and Cherry Cobbler...
And of course the version we made at Stamp Club with Marina Mist, Night of Navy and Bashful Blue snowflakes...
TUTORIAL:
Cut 2 pieces of card stock. One piece will be 8 1/4" x 3 3/4'" This will be the box.
The other piece measures 5" x 6". This will be the sleeve.
If you wish to stamp a design on the Sleeve, you may do it now, or after the Scoring step.
Using a scoring method, score the Box along the long side at:
1/2", 1 1/8", 2 5/8", 3 1/4"
Score along the short side at: 1/2", 1 1/8", 7 1/8", 7 3/4"
Score the Sleeve along the long side only at: 5/8", 2 1/4", 2 7/8", 4 1/2"
Use a bone folder to make crisp creases on all.
On the Box, cut out the "L" shape of each corner as seen here:
You can now begin to assemble the box. Note that there is a snip done with scissors at each of the 4 corners that is not easily seen. It will allow the little flap to fold up and in...
Fold little square flaps in so that the long sides come up and over them. The sticky strip along the long edge will hold it all together. (shown here is the sticky strip holding down the flap as well as ready to hold down the long edge)
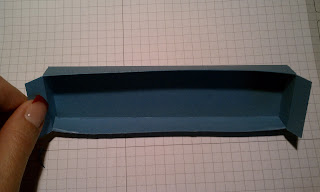
This is the box with both long edges assembled.
Add Sticky Strip to the short end flaps, and seal shut.
Next, add Sticky Strip to the edge of the Sleeve (which you've already scored, and made crisp creases).
Now the box will slide into the sleeve...
and should close nicely...
Have Fun!!


No comments:
Post a Comment